Archive for the ‘Paint / Oils / Stains / Varnishes / Painting Supplies / Wall Paper’ Category

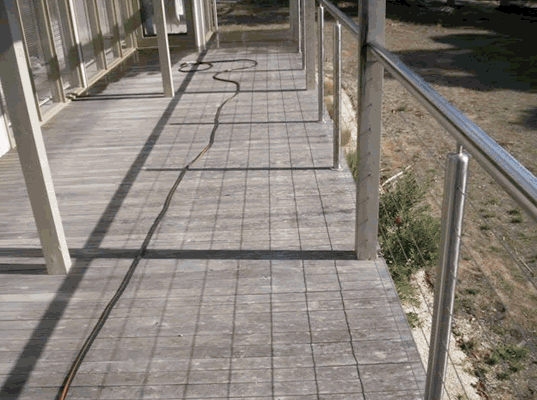
Does your deck look like this? If so do not despair, follow our steps here. Image supplied by Cutek.

With the footy prelim finals only a few days away we can start to turn our attention to the summer days and barbeques that will fill those non footy hours until next year.  It is therefore timely to start thinking about those summer preparation tasks that will help make them all the more enjoyable.  Previously we have featured articles on maintaining your pool and your barbeque, so today we are going to turn our attention to the deck.  In fact we are going to run a 10 day feature on everything you need to know about your deck!

So if you already have a deck, it is important to ensure that it is maintained.  What your deck is made of will influence how much maintenance it needs, however all decks even new ones will need to be sealed and given a little TLC to keep them looking their best. Here is our step by step for maintaining your deck:

1. Clear and sweep your deck before you start.

The difference is almost impossible to believe. This bench has just had the end of three boards sealed. Image from Cutek

2. Look over your deck first to identify any broken, loose or badly damaged boards.  If you have any of these you will need to replace them.

3. Now investigate for nails that are protruding from the timber.  These can do so much damage to bare feet, and given it is summer, who really wants to wear shoes.  If you find any give them a good hammer to ensure that the surface of your deck is flat.

4. Choose your timber sealant.  Some products require that the old paint or stain be removed prior to sealing so it is a good time to do your shopping.  Select both a sealant and if you have kids, animals or plants, a non-toxic cleaning solution.  In Australia a popular choice for sealing timber decks is by using Cutek.  Cutek works by penetrating deeply into the timber, others just coat the top, which when scratched or damaged will cease to protect that exposed surface.  In addition it doesn’t breakdown in sunlight and is designed to protect against Australian pests like termites!  Finally Cutek is also safe for humans, animals and the environment.  More information can be found at Timber Coatings Australia.

5. Depending on the instructions on your sealant (you may need to strip back paint or old coats of stain first) then you will be ready to clean your deck.  There are a number of substances like dirt and grime that over time will build up on the surface of the deck, even if it is predominantly under cover.  Think about your deck usage, barbeque grease and fat that has splattered from the grill, that dropped sausage or spilled drink, how many pairs of shoes have walked across it, do you have pets etc?.  The build up of this grime can lead to the deck being rough, or alternatively slimy if it starts to grow a mossy film. Yuck, so lets remove it.

6. Follow the instructions of your cleaning solvent and using a brush with bristles scrub at the deck.  Some solutions will require you spray the deck first, so do this if required.  Basically you just need to ensure that you complete the steps as indicated by your particular cleaning product.

6. Rinse the deck by hosing it down, then allow it to fully dry.

This is the same deck as shown in the first image. The transformation is great. Image from Cutek.

7. You are now ready to seal your deck.  You can do this by painting it (roller or brush) or spraying it.  Again if you have plants and other things you want to protect, we recommend taking the time to use a brush or roller.  Whatever you choose ensure that you have carefully read, understand and follow the instructions on your chosen sealant.  If you have chosen a Cutek sealant there are additional instructions here.

8. With your deck now sealed, you are ready to replace your chairs and barbeque.  String up the fairy lights and wait for the summer weather to roll around.

Before you go visiting the hardware stores, check out the DIY Bargain Bin Paints, Oils, Stains, Varnishes and Painting Supplies first.


Have you got a patch of flooring that you would like to hide? the kids stained it and you just cannot get rid or the mark?  Maybe you just have a large area and want to put something there to add some colour and life?

Today we have three fantastic cheap and effective ideas for decorating your floor from DIYideas. There is sure to be something to suit your needs.  We cover three very different mediums, but for each you will need just a little budget for some materials and paints.  To create any of these, click on the links provided for instructions.  We have included the pictures to help inspire you!

1. Vibrant Vinyl

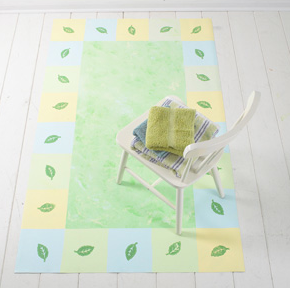
Using an old remanent of vinyl you can cut it down to size and after giving it a good clean up, can repaint it and then using a stamp create a pattern such as this leaf one around the border.

For full instructions on exactly what you need and how to go about this project click on the title.

2. Brighten a Jute Rug

This Jute rug was once a boring brown, but with a bit of paint and some thick sticky tape has been turned into a fun and funky rug.  Of course you do not need to use super bright colours and instead may go for a more natural look.

For all the instructions and how too, click on the title.  One tip though is to select a tightly woven jute for crisper lines.

3. Painted Design

Our final idea (courtesy of DIY Ideas) is the Painted Porch.  Here they have used two different tones to create a stripe.  First the porch is painted with the shades and then a stencil is applied to get the chicken wire effect, though you could use any type of stencil.

Click on the title for more information.

Don’t forget you can access all your rugs, vinyl and other flooring options from the DIY Bargain Bin, and also check out the DIY Bargain Bin Paints for your painting supplies.

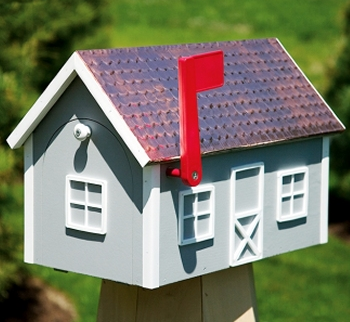
A painted and designed letterbox from American retailer The Lighthouse Peddler

Whether you have a brick or metal letterbox it is possible to paint it up so that it looks fantastic and individual.  Earlier in July we brought you a great list of ways to build your own letter box.  Many of these were wooden, and desperately cried out for some decoration, so here it is, the follow up to our DIY Letterboxes feature.

1. Keeping the wooden look

Having a beautiful wooden mailbox can be great, but to keep it looking good you will need to ensure that you finish the job.  First sand the letterbox with sandpaper.  Choose an exterior stain to suit the colour of wood you want to choose and give the letterbox two coats.

2. Painting your wooden letterbox

Another option is to paint your letterbox with one or more colours.  This can be great and add a vibrancy if you like bright colours, or blend the letter box with the garden by going for muted and natural colours.  Again sand the letterbox to remove any rough edges and round the joins.  Then choose a good quality oil based exterior paint.  Give the letterbox a good coat, then sand it slightly to remove streaks and apply the second coat.

3. Painting a metal letterbox

If you have purchased a metal letterbox and wish to paint it a different colour you cannot simply buy exterior paint and wack it on.  It is likely to end up streaky and will flake easily.  If you have painted or tried to paint your letterbox before sand it down before you start to remove an lumps, bumps or streaks.

Select a primer that is designed for metal and is in a spray can, use this to completely cover your letterbox.  Give it a light coat and this way you will not get any streaking or running.  Then select a spray can in the colour of your choice and go over the dried primer.  Ensure that you do not go too heavy otherwise you will get streaking.  If this should occur sand it off and try again.

Check out the DIY Bargain Bin for all your letterbox needs and your Paint, Oils, Stains, Varnishes and Painting Supplies.

Photo courtesy of Elizabeth :

So you have decided to start painting, and why not, spring is only just around the corner!  New colours can give your room an entirely new lease on life.

The colours in fashion for 2010 include a pull back to warm browns integrated with classic earthy colours says Resene Paints.  You can check out their 2010 Decorator Decisions two page Simply Living leaflet here for more ideas.

So with colours in mind and a whole swag of new furniture on order, it is time to start painting.  Here are our tips!

1. DO prepare your walls properly, see the DIY Bargain Bin Preparing a wall for painting guide.

2. DON’T paint on a day of extreme weather, be it hot or cold, windy or wet (if outside).  These could affect the quality of the paint.  The can should indicate the ideal temperature for painting and for best results it is wise to follow them.

3. DO carefully select your paint going for a good quality paint manufacturer. Consider how the area will be used, do you have children? If so does an easy wash paint make sense?  Is it outside? If so getting one with sun protection may increase the lifetime of the paint job.

4. DON’T use old paint that you have stored in the garage for a rainy day if it is over five years old or has been exposed to changing weather conditions it is likely to be no good.  Paint should last between 3-5 years if sealed tightly and kept in an area with a stable temperature, out of the sun. If in doubt about the paint, don’t use it or ask for an expert opinion.

5. DON’T thin out the paint to make it go further, this could lead to the wall looking streaky and will reduce the quality of your paint.

6. DO stir your paint really well before starting and follow the manufacturer’s instructions on the tin as you go.

7. DON’T apply the paint really thinly or thickly, there is no way around doing a second coat, so take your time to apply it evenly and consistently.

8. DO apply that second coat after the first has been allowed to dry.

For all your painting needs, check out the DIY Bargain Bin Paints, Oils, Stains, Varnishes and Painting Supplies section.

Photo courtesy of Heather (OMSH)

Painting is so easy, take a brush dip it into a can of paint and then brush it on the wall.  What could be difficult about that?

Well nothing, but your finished job may not look very good.  You may notice that the paint starts chipping, pealing, bubbling or may just appear quite streaky or uneven.

The reason will not be anything to do with the quality of the painting that you have just completed.  Painting really is very simple.  The problem however will be entirely because the wall or surface was not prepared properly prior to you commencing.

Preparing your surface before you start painting is absolutely essential to ensuring you get a good, even and professional result.  Unfortunately it is not a particularly fun or quick job, but getting it right first time will save you the hassle and time of having to paint it again in the immediate future.

1. Remove any wallpaper. This is the best plan for all wall paper because over time it will start to peel, however if it is in really good condition you may paint over the top of it.  If you do have any rips, uneven patches or peeling, remove it now by peeling or scraping it off.

2.  Scrape off any chipped or peeling paint using a paint scrapper.

3. Check your wall to ensure that it is free of any holes, dents etc.  You can paint over these as they are, but they will be forever visible.  It is prudent to patch them up with plaster filler now and then let the area fully dry.

4. Give the surface a light sand, this is especially important should you have stripped wallpaper, scraped off old paint or touched up any holes.  This will give you a much smoother surface to work with.  Use a fine grade sandpaper.

5. Clean your wall – This step is really important regardless of your preparation to this point.  Even if you haven’t needed to remove wallpaper, scrape away old paint or touch up any holes, you will still need to clean your walls.  The best thing to use is sugar soap which you can get from most supermarkets and all hardware stores.  It is one of the most effective solutions for removing the build up of grease, grime and dirt from the walls, some of it not even visible to your eyes.  Dilute the sugar soap according to the directions on the product and give your wall a good wash with a soft cloth, being sure to wring it out regularly.

6. Allow your walls to dry for a good 24-48 hours.

Your walls should then be ready to paint in whatever colour you desire!  DIY Bargain Bin has a wide range of brushes and paints in the DIY Bargain Bin Paint / Oils / Stains / Varnishes / Painting Supplies / Wall Paper section.

Photo provided courtesy of Warren Prasek

When is a rail required? The Building Code of Australia aim to ensure safety, and in relation to stairs or ramps, require the installation of a continuous balustrade or barrier where they are alongside of a drop of more than 1 metre.

How tall does it need to be? The balustrade or barrier must be at least 1 metre above the level of the walkway, or at least 865mm above the nosing of the stair. It should be designed so that a person cannot fall over it nor allow a child to crawl through it.

How strong is it required to be? Your rail should be structurally able to withstand a point load of 0.6kN and an evenly distributed load of 0.4kn applied inward, outward or downward on the handrail.

What timber should I use? For outdoor rails that are exposed to the weather, the timber should be durable Class1 or Class2 timber species such as blackbutt, spotted gum, ironbark, jarrah, merbau or kwila with any sapwood present (or preservative treated softwood) treated to H3 standard.  Ideally, the timber should be free of any major strength reducing features and be straight. Find your Balustrade or Railing in the DIY Bargain Bin Balustrades, Railings, Steel Post, Poles, Tubing and Accessories section.

What else do I need to know? If the railing is outside, use quality Class 3 corrosion resistant metal connectors such as nails and screws.Fill any nail holes with exterior grade wood filler and apply two top coats of exterior paint or stain to protect your timber. You can find a selection of DIY Bargain Bin Hardware, Nails, Screws, Bolts and Nuts as well as DIY Bargain Bin Paint / Oils / Stains / Varnishes / Painting Supplies by clicking on these sections.

Need more information? Read and understand the  Australian Building Inspection Services guidelines, from which this summary has been taken to fully understand your responsibilities in building an indoor or outdoor timber rail.